
Before you start
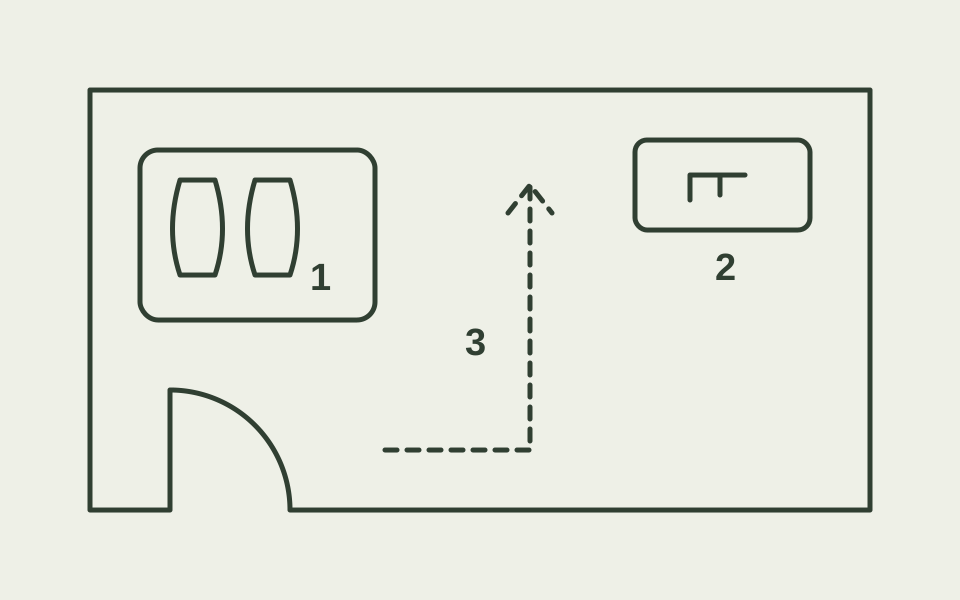
Fully open the entrance door, nearby doors and existing cupboards. Sketch the space needed to move around before measuring storage positions. Account for everyone in the household and any mobility aids; storage must not restrict necessary access or escape routes.
Keep the route clear first
Plan the path from the door to the rooms and space to put on and remove shoes. Furniture may fit against a wall yet get in the way once opened or surrounded by bags. Check the actual movement, not just an empty floor plan.
Try it before buying
Walk through carrying a shopping bag and open the doors. Mark areas on your sketch that need to stay free of objects.
Keep only the current shoe rotation nearby
Decide which pairs you will actually need this week. Store seasonal and rarely worn shoes elsewhere. The usable area must accommodate your real shoe sizes; a product photograph showing small shoes does not prove capacity for your household.
Try it before buying
Place the chosen pairs side by side and measure their footprint. If they do not fit, reduce the selection before adding more levels.
Separate wet shoes from dry storage
A removable shoe tray can collect drips and dirt. Plan how you will lift it and clean underneath. Dry footwear according to its care instructions before putting it in closed storage. A tray does not replace drying or regular cleaning.
Try it before buying
Try a suitable wipe-clean mat you already own in the intended position. Check whether shoes overhang or the door catches the edge.
Give keys and bags defined places
A small bowl on an existing shelf is often enough for keys. Bags, backpacks and post should not overwhelm that same space. Give incoming papers a limited area and clear it regularly. Do not hang a heavy bag from an unverified adhesive hook or unstable stand.
Try it before buying
On your next return, put everything in its planned place. Anything still in your hand needs a separate place or should go straight to another room.
Test the daily routine before buying furniture
A freestanding shoe rack needs depth and may require anti-tip fixing according to its instructions. A slim tilting shoe cabinet may need wall attachment and can be too short inside for some shoe sizes. “Slim” is not a compatibility guarantee for your hallway.
Try it before buying
Put an empty box with a similar footprint in position for a few ordinary days. Include cleaning, door movement and visitors in the trial before buying.
Example: a place for everyday pairs
Two people want to leave one daily pair each by the door. Put those exact shoes on a paper template of the proposed tray, for example 46 × 35 cm externally. Its rim reduces the usable area. Two large pairs will not necessarily fit just because a photograph shows two pairs.
If the area is too small, check another available position or a smaller rotation. A larger rack is not helpful if it obstructs access. Keys can stay on an existing shelf, so improving the routine need not require new furniture.
Which problem does each option solve?
| Option | Purpose | Limitation |
|---|---|---|
| Shoe tray | Collects drips and dirt in one place. | Check capacity with your actual shoes. |
| Open shoe rack | Separates dry everyday pairs. | Check depth, stability and required fixings. |
| Bowl on an existing shelf | Provides a reliable home for keys. | Avoid turning it into a household dumping ground. |
A concrete example to compare
IKEA BAGGMUCK · 405.737.56
46 × 35 cm overall, according to the manufacturer.
A removable shoe tray as an example of a defined zone by the entrance. Test capacity with your own footwear.
The rim reduces usable space. Overall dimensions do not prove room for two large pairs; account for door movement and cleaning.
Check manufacturer specifications →
Selected from manufacturer specifications, not our own product test. This is not an affiliate link. Details checked on 2 October 2026.
Your checklist
Check these points before choosing a solution. Tick marks apply only to this visit.